Tuesday, September 10, 2013

End of Summer Salad with Corn, Tomatoes & Black Beans

As summer comes to a close, I thought it would be fun to create a simple salad with some of the ripest ingredients still available in the market. We're just at the tail end of sweet corn season so if your market doesn't have any fresh sweet corn you can substitute frozen corn kernels. However, tomatoes are still at their peak! Grab a pint of sweet cherry tomatoes, snack on half, and save the other half for this zesty, colorful salad.

Until next year, dear Summer, we'll miss you! 


End of Summer Salad with Corn, Tomatoes, & Black Beans


Ingredients
2 tbsp lime juice
1 tbsp white wine vinegar
1 tsp sugar
1/4 tsp ground cumin seed
1/4 garlic powder
6 tbsp extra virgin olive oil
salt and ground black pepper to taste
6 ears sweet corn, husked and cleaned,
     or 1 16-oz bag of frozen corn niblets
1 cup cherry tomatoes, halved
1 14-oz can black beans, rinsed and drained
1/2 cup red bell pepper, seeded and diced
3 green onions, thinly sliced
1/4 cup coarsely chopped cilantro
1 fresh jalapeno, seeded and minced (optional)

Directions
In a small bowl, combine lime juice, vinegar, sugar, cumin, garlic and olive oil. Whisk together the dressing and season with salt and pepper to taste. Set aside.

If using fresh corn, place the corn in a large pot with enough water to cover, and bring to a boil. Cook 5 minutes, until kernels are tender but crisp. Drain, cool slightly, and use a knife to scrape kernels from the cobs. If using frozen corn, allow to thaw for 1 hour in a colander.

In a large bowl, mix the corn kernels, cherry tomatoes, black beans, red bell pepper, green onions, cilantro, and the jalapeno, if you are using it. Add the dressing and toss to coat. Season with a little more salt and pepper. Chill 15 minutes before serving.

Did you try any new salads this summer? What was your favorite?

Thursday, August 8, 2013

How to Make Homemade Ketchup


I demonstrated how to make homemade ketchup on a recent episode of New Day Northwest. If you'd like to watch the demonstration, just click on the image below. 


Below you'll find the complete Ketchup recipe.


Ketchup
You'll think you're eating a national brand - minus the high fructose corn syrup!
Makes about 2 cups

Ingredients
2 1/4 lb plum tomatoes
1 1/2 cups white vinegar
2 1/2 tsp coarse sea salt or kosher salt
1 cup sugar
1 tsp onion powder or 1 tbsp grated onion
1/2 tsp mustard powder
1/4 tsp ground cinnamon
1/4 tsp ground cloves
1/4 tsp ground allspice
1/4 tsp ground black pepper

Directions
Bring a large pot of water to boil. Add the tomatoes and blanch until the skin breaks and the flesh becomes soft, about 5 to 10 minutes.

Drain the tomatoes and press through a fine-mesh food mill or sieve to remove the skin and seeds.

Pour sieved tomatoes into a medium-sized sauce pan. Add the vinegar and salt. Stir to combine. Bring tomato mixture to a boil and whisk in the sugar and spices. Return to a low boil, stirring occasionally, until the mixture has reduced to 1/4 the original amount and thickened, approximately 1 hour. Some tomatoes are more watery than others so additional cooking might be necessary to reduce moisture. Your ketchup should be the consistency of tomato puree, slightly thinner than bottled ketchup. It will thicken slightly when it cools.


Pour into a sterile jar or container. Cover and refrigerate. Store, covered in the refrigerator for up to 1 month. 

Excerpted from The Kitchen Pantry Cookbook by Erin Coopey (Quarry Books, 2013). Copies available on Barnes & Noble.com and Amazon.com, as well as many independent bookstores - ask your local bookstore to order it for you!

Tuesday, July 30, 2013

It All Makes Senf To Me (That's German for Mustard)

When Vince and I visited Germany several years ago, I fell in love - with the people, the mountains, and the mustard.  When I was creating recipes for The Kitchen Pantry Cookbook, I knew I had to include a Bavarian-Style Yellow Mustard. This is my homage to the delightful, lightly sweet, slightly spicy mustard I had so often on that trip. 

BAVARIAN-STYLE MUSTARD

This sweet-hot mustard is the perfect companion to wieners, bratwurst, and knockwurst. It also makes a nice dip for pretzels. I’ve suggested two different preparation methods—slow and quick—in this recipe. If you are interested in the natural mellowing of mustard and have the time, try the slow method. If you’d like to eat the mustard right away, the quick method is the one for you.

Yield: Makes 1 cup (175 g)

Ingredients
1/2 cup (72 g) yellow mustard powder/dry mustard (see Note)
1/4 cup (60 ml) warm water
2 tablespoons (26 g) sugar
1 teaspoon kosher salt or coarse sea salt
2 tablespoons (28 ml) cider vinegar

Directions

Slow Method—Combine the mustard powder, warm water, sugar, and salt in a bowl. Stir until a smooth paste is formed. Cover the bowl with plastic wrap and let sit overnight or up to 24 hours.

Stir in the cider vinegar. Transfer the mustard to an airtight container. Cover. The mustard will continue to mellow if left at room temperature. You can allow the mustard to rest on your counter for up to 8 weeks before refrigerating. Test the flavor occasionally to determine whether it has mellowed to the level you desire. When you are satisfied with the flavor, transfer the jar to the refrigerator.

Quick Method—Increase the water to 1/2 cup (120 ml). Combine the mustard powder, warm water, sugar, and salt in a small saucepan. Heat over medium-low heat for 1 hour, stirring occasionally. Maintain a low heat. Do not simmer or boil. Remove the pan from the heat and stir in the cider vinegar. Cool to room temperature and transfer to an airtight container. Cover and refrigerate. The mustard can be stored in the refrigerator for up to 12 months.

Note: For spicier mustard, try using Penzeys Regular Canadian Mustard Powder, a blend of brown and yellow mustard.

Heat and Mustard
I’ve seen many mustard recipes over the years that suggest mixing up the mustard, letting it rest overnight, and diving right in. I’m not suggesting those recipes are wrong, but—a word of warning—if you’ve mainly eaten commercially prepared mustards, you might be in for quite an assault on your taste buds, not to mention a clearing of your sinuses, and perhaps a flush of your tear ducts. Homemade mustard can take weeks to mellow.

So, why is the yellow mustard we buy from the grocery store less intense? Well, when mustard seeds are cracked or ground and mixed with cool liquid, a chemical reaction occurs that releases fiery chemical compounds, myrosin and sinigrin. Adding warm liquid instead diminishes some of the burst of heat. In addition, acids, like vinegar, can slow the decline of the heat. If you like a milder mustard, use warm water or warm the mustard over medium-low heat and add the vinegar after the mustard has set for a time.

Incidentally, mustard does not need to be refrigerated, but refrigeration does help maintain the potency.

Excerpted from The Kitchen Pantry Cookbook by Erin Coopey (Quarry Books, 2013)

Wednesday, July 10, 2013

Burger Nirvana - Smells Like Summer Spirit!

Okay, so my title might have been influenced by the fact that I live in Seattle. (That's a nod to all you reformed grunge listeners.) Or! It could be because I have ascended to a transcendental state of burger bliss. (Let's go with that one!)

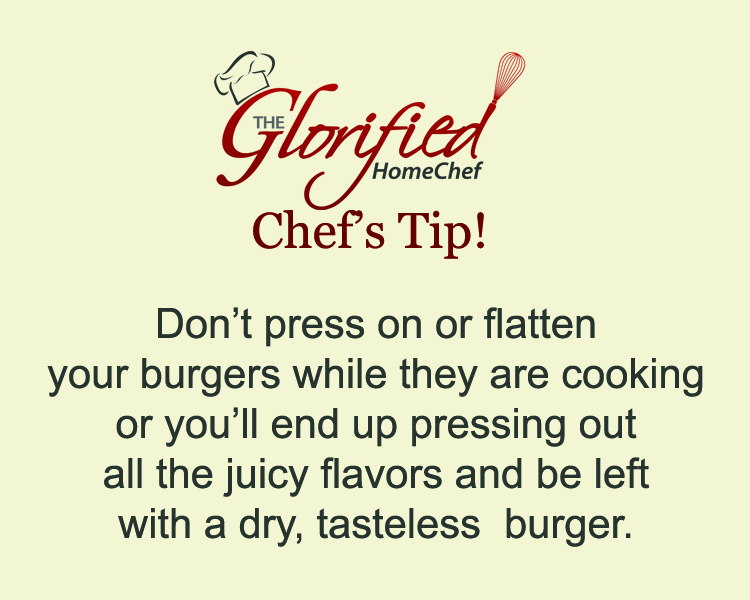
Burgers are classic American BBQ fare. I'm sure that there have been many heated discussions about what constitutes the best burger. Ultimately, I think most will agree that the burger has got to be juicy and flavorful.

So, you're looking for the secret? What constitutes the Best Burger Ever? I've got a few tips that will change the way you eat burgers forever. You know you want it...juicy, flavorful, burger nirvana! Get out some extra napkins because this tiny pat of heaven is gonna rock your burger world.


The Best Burger Ever!

1 1/2 to 2 pounds 85% lean/15% fat grass-feed beef
Burger Nirvana Butter, recipe below
Chef Erin's Steak Shaker, recipe below (I can't believe I'm giving out my secret recipe!)
4 hamburger buns, your favorite
Burger condiments, your choice

Fire up the grill or preheat your grill pan. Medium heat is best. You don't want to char the outside before the inside is properly cooked. 

Divide the ground beef into four equal portions. Slice four pats of Burger Nirvana Butter, about 1/8 to 1/4 thick each. Make an indentation in the center of each burger portion, and stuff a pat of Burger Nirvana Butter into the indentation and shape meat into a patty. (Be sure that the butter isn't sticking out anywhere.) Season each patty generously with Chef Erin's Steak Shaker.

Grill burgers to the desired doneness - about 7 minutes per side for medium, or 10 minute per side for medium well.* Remove from grill and allow to rest for 5 minutes. In the meantime, spread a little of the Burger Nirvana Butter on the inside of the hamburger buns and toast lightly on the grill or grill pan. Top with the burger and your favorite condiments, serve and wait for the "oohhs" and "aahhs!"

*Note: I wouldn't recommend cooking a burger less than medium temperature.  Grinding beef takes all the bacteria from the outside and mixes it into the meat.  If you cook your ground beef to less than 160F (medium), you won't kill all the potential bacteria that causes food borne illness. Don't worry though, the Burger Nirvana Butter will ensure that the burger stays juicy even when the meat is medium well or well done.

Makes 4 6 to 8-ounce burgers.


Burger Nirvana Butter

2 sticks butter
1 clove garlic, minced
1 Tbsp minced shallots
3 Tbsp chopped fresh parsley
1/2 tsp Dijon mustard

Chop the butter into chunks. Using a mixer with a whisk attachment, whip the butter at medium speed until it softens and lightens in color, about 5 minutes.

Add garlic, shallots, parsley, and mustard to the whipped butter and beat for another 1 to 2 minutes until blended. Scrape the butter from the mixing bowl onto wax paper or plastic wrap. Use the edge of a baking sheet to form the butter into a tight log. Chill for 2 hours before serving or freeze for up to a month.

Chef Erin's Steak Shaker
(By the way, this makes everything taste better...really.)

1/2 c kosher salt
2 tbsp black pepper
2 tbsp garlic powder
1 tbsp onion powder


Combine all ingredients and place in a shaker with a lid. If left uncovered the garlic powder will decrease in pungency over time.

Wednesday, July 3, 2013

Rules to Grill By: Tips for Grilling Vegetables

Here are a few pointers to make grilling vegetables a snap every time!

One of the most important things to remember to do is make sure you cut your vegetables approximately the same thickness so that they cook evenly.
Grill veggies over medium heat and be sure turn them often to avoid overcooking/burning. Never leave vegetables unattended unlike meat which can be somewhat forgiving vegetables are very time and heat sensitive.
Brush or drizzle oil on vegetables for added flavor and to help vegetables from sticking but DO NOT oil the grill itself because that can lead to flare up and charred vegetables.
The grill surface should be CLEAN to avoid sticking (prior to heating).
Secure thick slices of onion (at least 3/4" thick) with tooth picks to ensure they don't fall apart on the grill.
Parboil small, waxy potatoes or thick slices of sweet potatoes (at least 1" thick) until just tender. Let them cool to room temperature before you grill them.
You should also try basting grilled sweet potatoes with a little rum butter just before you serve them. To make Rum Butter, simple combine 2 tbsp butter, 6 tbsp light brown sugar, 2 tbsp rum, and 1/4 tsp vanilla in a small sauce pan over medium heat. Stir until melted and then brush or drizzle over grilled sweet potatoes. I swear they'll be the hit of the party.


Soak sweet corn in cold water for 1 hour prior to grilling. This will help the corn to stay juicy. I grilled corn in the husk instead of using aluminum foil. Simply remove the silk, soak and grill for 15 minutes over medium heat, rolling the cob every 3 minute or so.
When grilling large mushrooms like Portobello, remove the stem and start by grilling them stem-side up. This allow the natural juices to collect and the natural flavors of the mushroom are enhanced.


Don't crowd your skewers - leave about 1/8 of space between chunks of vegetables. This helps speed the cooking process and allows vegetables to cook evenly. 

For grilling smaller pieces of vegetables, try using foil packets or a grilling basket so the veggies don't fall through the grate. If you make foil packs, be sure to use heavy duty aluminum foil so they will stands up to the heat of the grill.
If you are grilling kebabs  soak your wooden skewers in water for 30 minutes before you skewer your vegetables and start grilling. This will keep your skewers from burning away while you are cooking. 

I like to toss grilled vegetables with flavored butters like garlic butter or Burger Nirvana Butter for a delicious finish!
Happy Grilling!
What is your favorite vegetable on the grill? Do you have any tricks or tips your could share?

Monday, June 24, 2013

Nice Rack! I mean Baby Back Ribs, of course.

baby back rib recipe


I really love grilling season! Give me a burger, a brat, a hot dog, chicken, vegetables - you name it, I'll grill it. But, there's one food that I associate with summer almost more than the rest - Barbecued Baby Back Ribs.

Last weekend, I make my first batch of ribs of the season. They were tender, gooey, finger-tip suckingly yummers.  So yummy, that the next day all I could think about was making more.  So that's exactly what I did!

Okay, in my humble opinion, a good baby back rib should be tender, succulent, almost falling off the bone.  Don't give me some dried piece of jerky on a bone, slathered in barbecue sauce, and expect me to gnaw away at it. I want the meat on my baby back ribs to pull from the bone languidly like Scarlett swooning in Rhett's arms.

If you are the same, there are only a few ways to achieve the tender result.
  • You can smoke the ribs for hours. For me, this is a little overkill, both in smoke flavor and in effort. I have had some Texas-style bbq ribs that were so smoke infused I thought I'd need a ventilator to breath while chewing. 
  • If you are a grill master, you can try indirect grilling, keeping the heat to one side to slowly roast the ribs. The trouble with grilling is unless you have gas grill, it's quite a task to maintain your temperature low and slow for hours. I'd rather enjoy my day chatting with friends than stoking coals to get keep them consistent. There are people who totally groove on this though, and if you are one of them - more power to you.
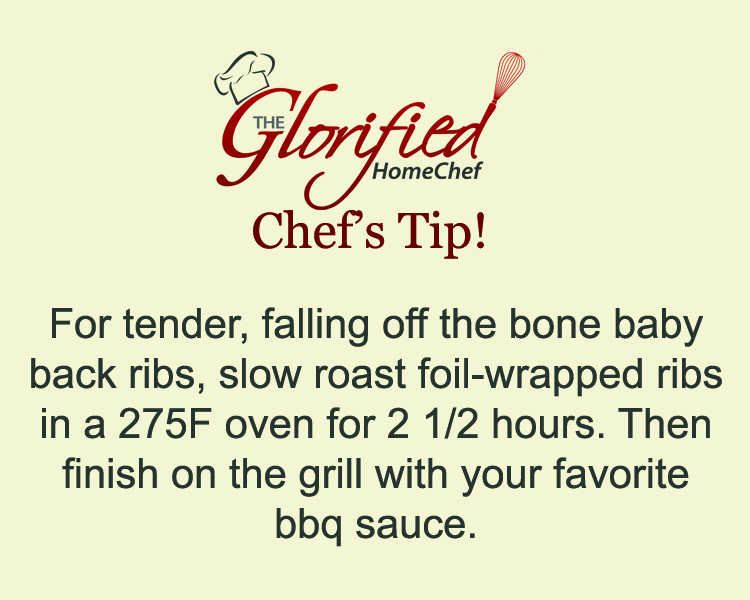
  • Frankly, as with so many recipes/specialties in cooking I think there's a lot of unnecessary fussing and complication. I like to slow roast my ribs in the oven and finish them on the grill. It is the least effort and the most consistent result. That's why I oven-roast/steam my ribs and finish them on the grill.  If you are looking for "Never Fail Baby Back Ribs" then you've come to the right site.

how to cook baby back ribsNever Fail Baby Back Ribs
Serves 4 to 6

1 tbsp light brown sugar
1 tsp sweet paprika
1 tsp smoked paprika (Spanish Pimenton)
1 tsp mustard powder
1 tsp coarse sea salt or kosher salt
1 tsp freshly ground black pepper
½ tsp granulated garlic
½ tsp onion powder
2 racks baby back ribs
2 to 3 cups barbecue sauce, your favorite

Preheat oven to 275F.

In a small bowl, combine brown sugar, paprikas, mustard powder, salt, black pepper, granulated garlic, and onion powder. Use a fork to blend completely. Set aside.

To prepare the ribs, first, remove the silver skin from the underside of the ribs. Use a paring knife to catch the edge of the membrane and then slide your fingers under it and pull it away from the bones. 


Rub the ribs with the seasoning on both sides.


Wrap each rack of ribs in a layer of heavy-duty aluminum foil. Fold the edges to seal tightly. Place the racks on a baking sheet or in a large roasting pan. Place into the oven and bake until the ribs are tender, about 2 ½ hours.


how to cook baby back ribs


Preheat grill to medium temperature.

Remove the ribs from the oven and unwrap the aluminum foil. Starting with the meaty side down, grill the ribs for 15 minutes. Flip the racks over and grill for an additional 5 minutes. 
Baste the ribs with ½ cup to 1 cup of barbecue sauce and grill for an additional 10 minutes. Remove racks from the grill and let the ribs rest for 5 to 10 minutes before cutting into sections. Serve with additional barbecue sauce.

Tuesday, June 4, 2013

Mango Madness

My local grocery store has tons of mangos on sale and I also received an enormous, ripe beauty in my CSA (Community Supported Agriculture) box this week - so it must be Mango season!
I just love a succulent, juicy mango whether it's sliced "hedgehog-style" with lime juice and a touch of chili powder or diced in a fruit salad with strawberry. I recently had the most delightful martini of mango sorbet and vodka and highly recommend that combination as well.

My grocer has been stocking two types of mangos lately. The Common Mango and the pale yellow, sugary-sweet Champagne Mango. I prefer the Common Mango and its fleshy, peach-like, texture. It's sweet, without setting my teeth on edge.

If you're stumped as how to select a ripe mango, here are a few tips. Try sniffing the stem end for a fragrant fruity odor, or squeeze very gently, if its ripe the flesh with be firm yet yielding feel under your fingers. If you've purchased a under ripe mango have no fear, placing the fruit in a paper bag on your counter overnight usually does the trick.

Mango peel is considered inedible so you should remove it. You can either peel it like a banana or, use a knife to slice around the large central seed, as you would an avocado. Twist the fruit gently to divide it into two halves, and remove the seed. Sometimes the seed lifts right out but if it doesn't, you can coax it out with your knife. At this point, you can spoon the fruit directly into your mouth or - if you feel like sharing - slice or cube it.


For years I've been making a mango salsa that is absolutely to die for (if I do say so). It has splashy colors, bright citrus notes, and just a hint of heat to balance the sweetness of the mango. It's perfect for simple grilled chicken or fish. I wanted to share it with you just in time to kick off grilling season.


Mango Salsa
Serves 4
1 medium mango, peeled and diced
1/2 medium red bell pepper, diced
2 tbsp red onion, minced
1/2 to 1 jalapeno, seeded and minced
1/3 cup chopped cilantro
3 tbsp fresh squeezed lime juice
salt to taste


Combine ingredients in a medium mixing bowl. Toss to mix. Season with salt to taste. 

Serve on grilled chicken, pork, or shrimp.
Don't you just love food that's pretty and easy to make? Me too!